DIY EV 9: Motor in!
It’s been a while since I posted an update on the DIY EV, but that’s not because I’ve been idle! I’ve just been spending more time doing, and less time posting. So the next few posts will be hasty ‘paste and dump’ posts to just checkpoint progress.
This post is about mounting the motor.
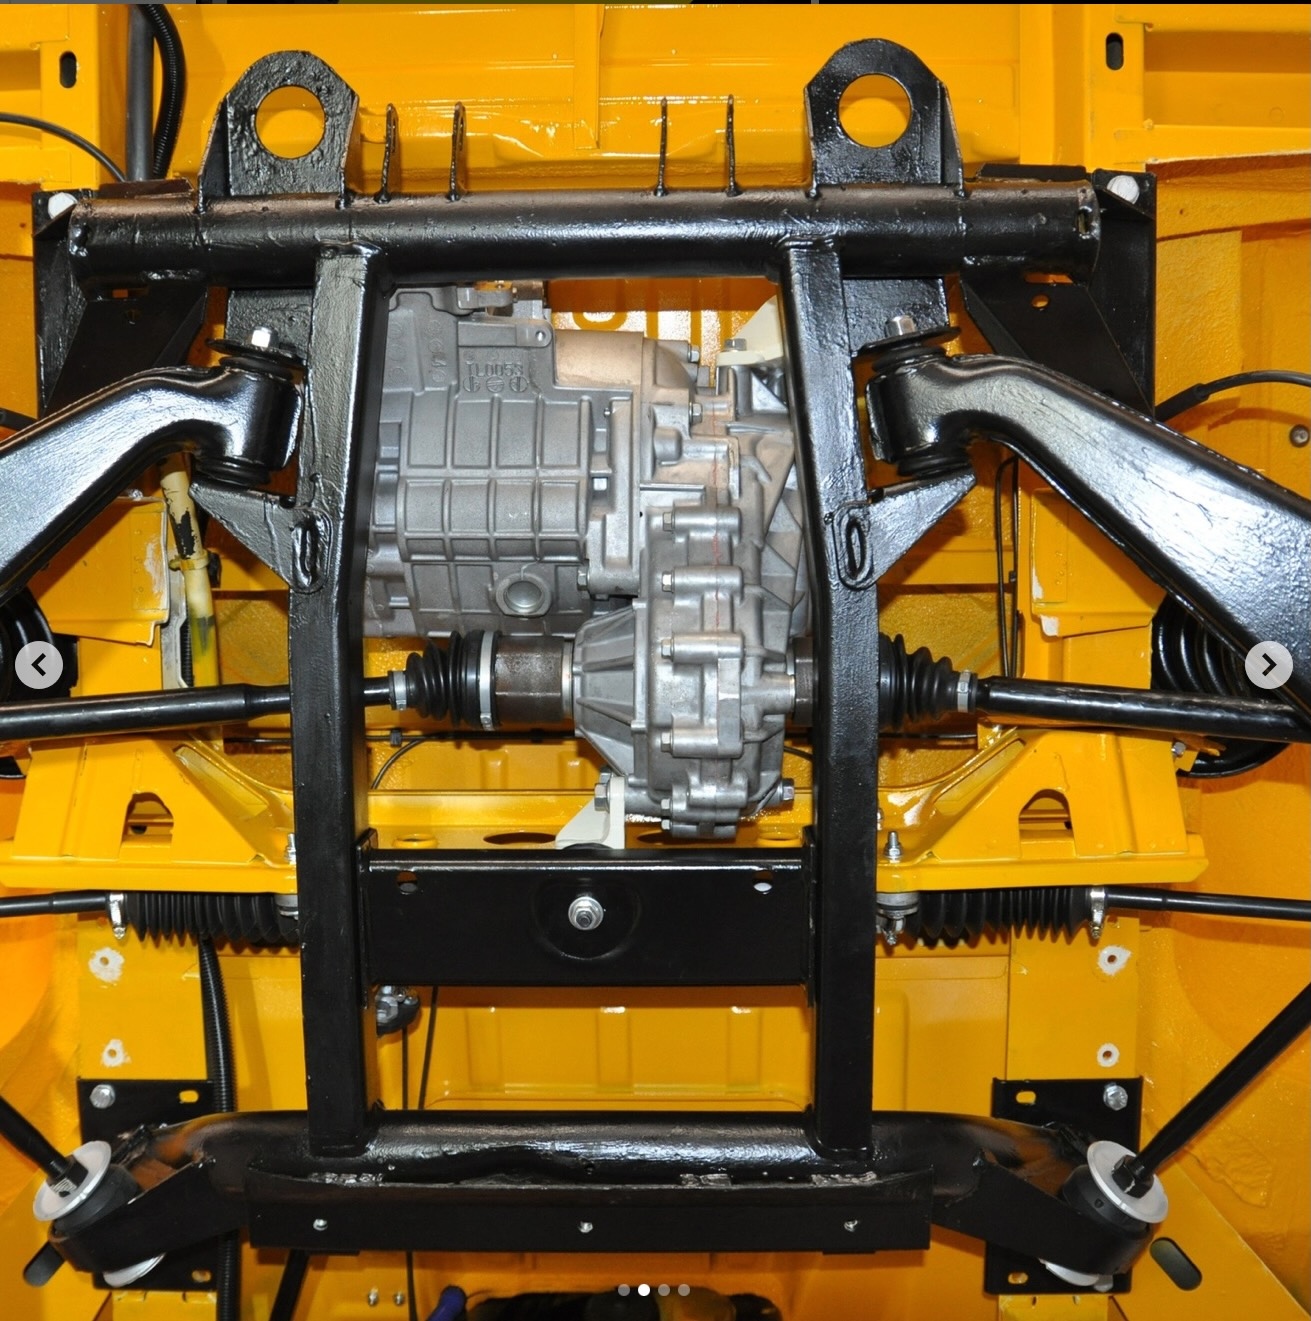
I have pretty much given up on mounting an Outlander motor on the Syncro front diff, and was going to mount it in place of the ICE motor, when this popped upon my instagram feed:
Here is the very impressive render from their insta page:
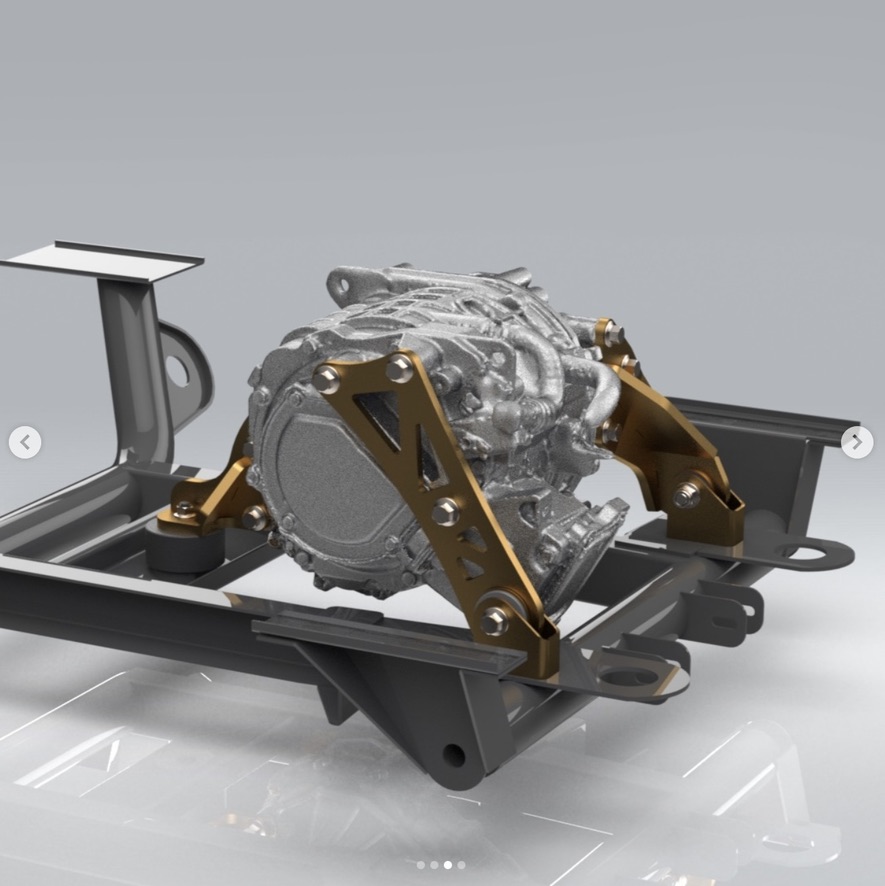
These guys, Evision, had managed to successfully mount an Outlander RDU where the Syncro front diff usually sits - I have no idea how. Anyway, I got hold of them, and they were happy to sell me two sets of mounts. Some money changed hands and they were shipped to me a couple of weeks later.
When they got to South Africa I had a bit of a fight with customs because there was no attached invoice, but eventually it was sorted out and they arrived.
I took the syncro to my crazy projects ‘go to’ guy Eddie, who then proceeded to take about 8 weeks to get the motor actually mounted. It was quite the ordeal. Here’s what the issues were:
- Eddie just ignored the bus for about 4 weeks
- When he finally started, some of the mounts were drilled with holes that were too small for the included rubber mounts. So they had to be drilled out.
- My front subframe has soe serious refurbishment required. Several bolt holes were so worn that they were no longer round, they were ellipsoid. So we had to repair those.
- The clearances were extremely tight. We had to shave bits off the subframe in one place and the underbody in another place, but, all in all, nothing major.
- The Outlander differential stubs and the Syncro outer stubs are both solid units which are held in with a circlip. SO you can’t detach the drive shaft by unbolting it like on the OEM diff. ou have to remove the wheel and then pull the drive shaft apart each time. This can be remedied by using Brat’s Outlander T3 stubs, but I don’t want to spend that much coin.
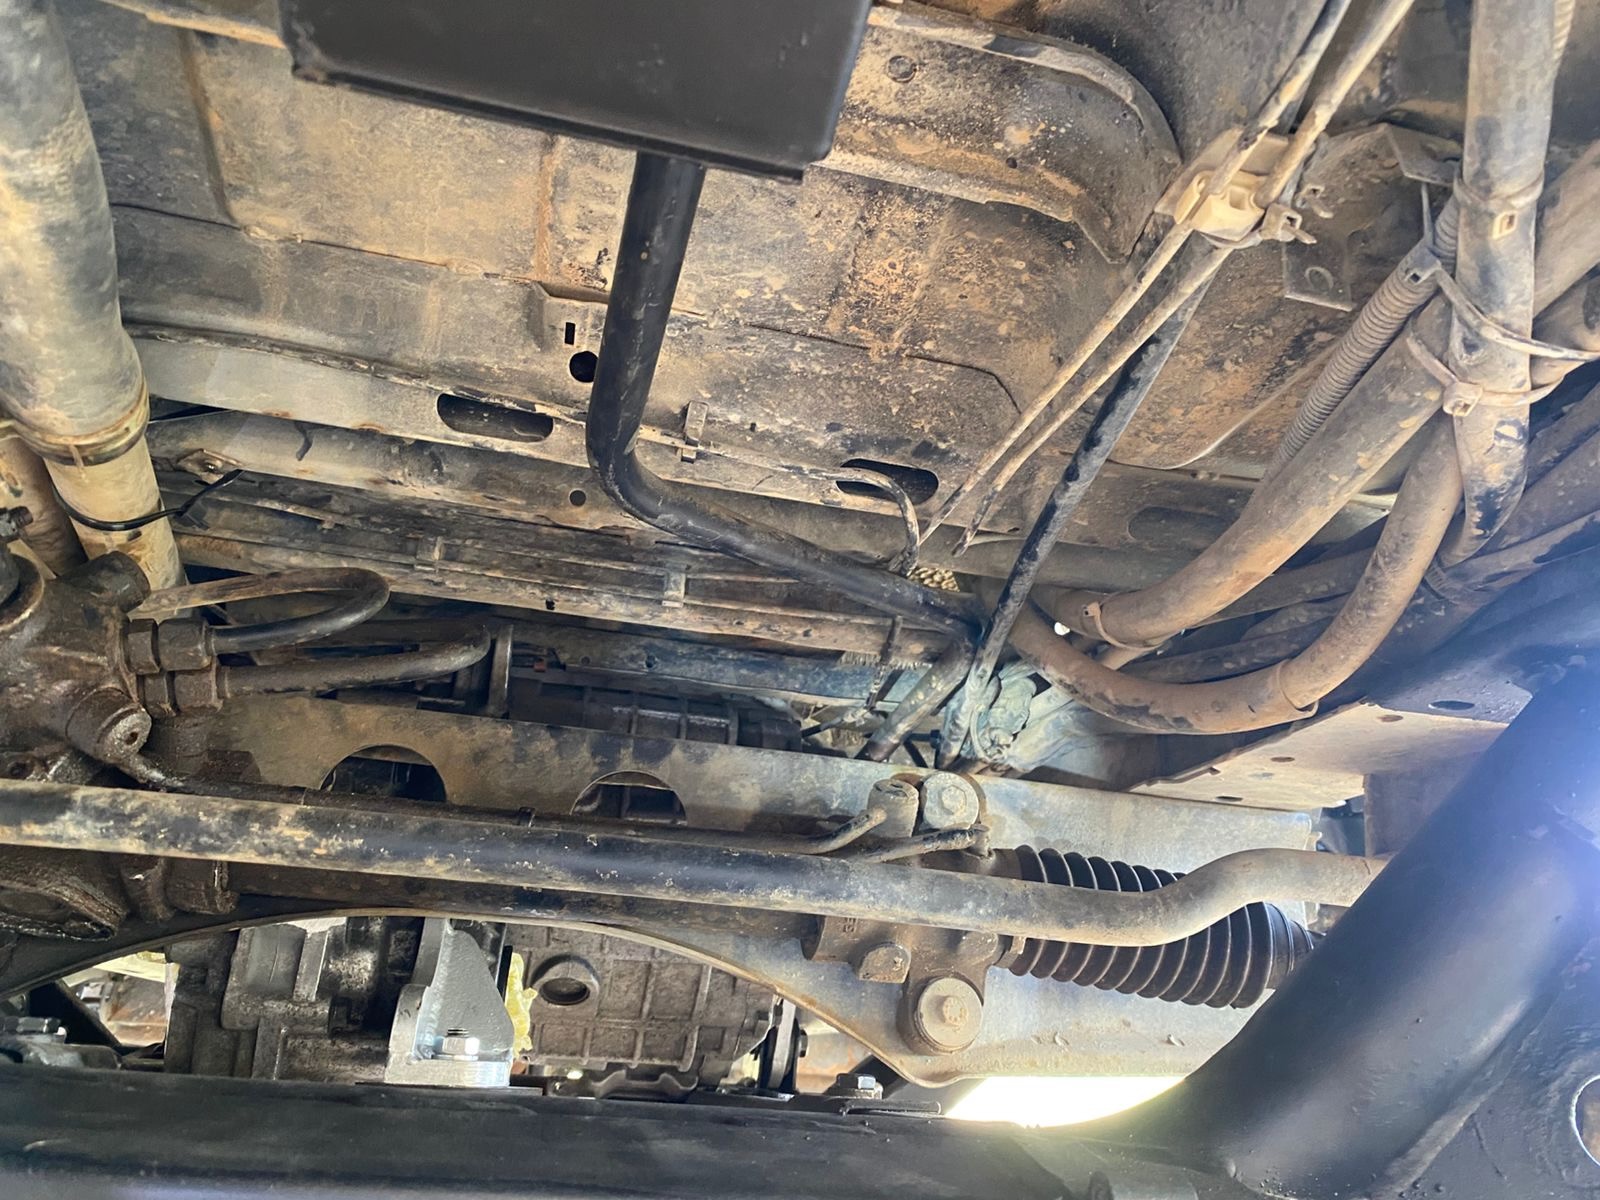
- This was a big one. Evision didn’t mention that the gear shift linkage interferes with the motor placement. So we had to cut the linkage and weld a large U shape in it so that it goes around the motor. I can still shift ok, but it’s a bit more vague now (and it was vague to begin with).
- All coolant piping needed to be rerouted
- The drive shafts needed to be made up by cutting the old OEM ones and mating them to the Outlander ones.
I’m sure there were many more issues which I’ve forgotten or Eddie didn’t tell me, but he didn’t lose his cool once, which I think it pretty impressive.
It all came to a head at the end of week 8, when I arrived at the arranged pick up time, and my bus was still in the air with no wheels on. I ended up sitting with Eddie while he finished up the drive shafts, put the motor in and reinstalled the wheels.
With the motor in, the car drives just fine as a normal 2wd petrol Kombi. You wouldn’t know the electric motor is there except for a mild electric whine at low speed. It’s currently freewheeling now, I need to connect up the other high voltage components and get it spinning.
Here’s a photo of the weird U bend in the gear linkage.
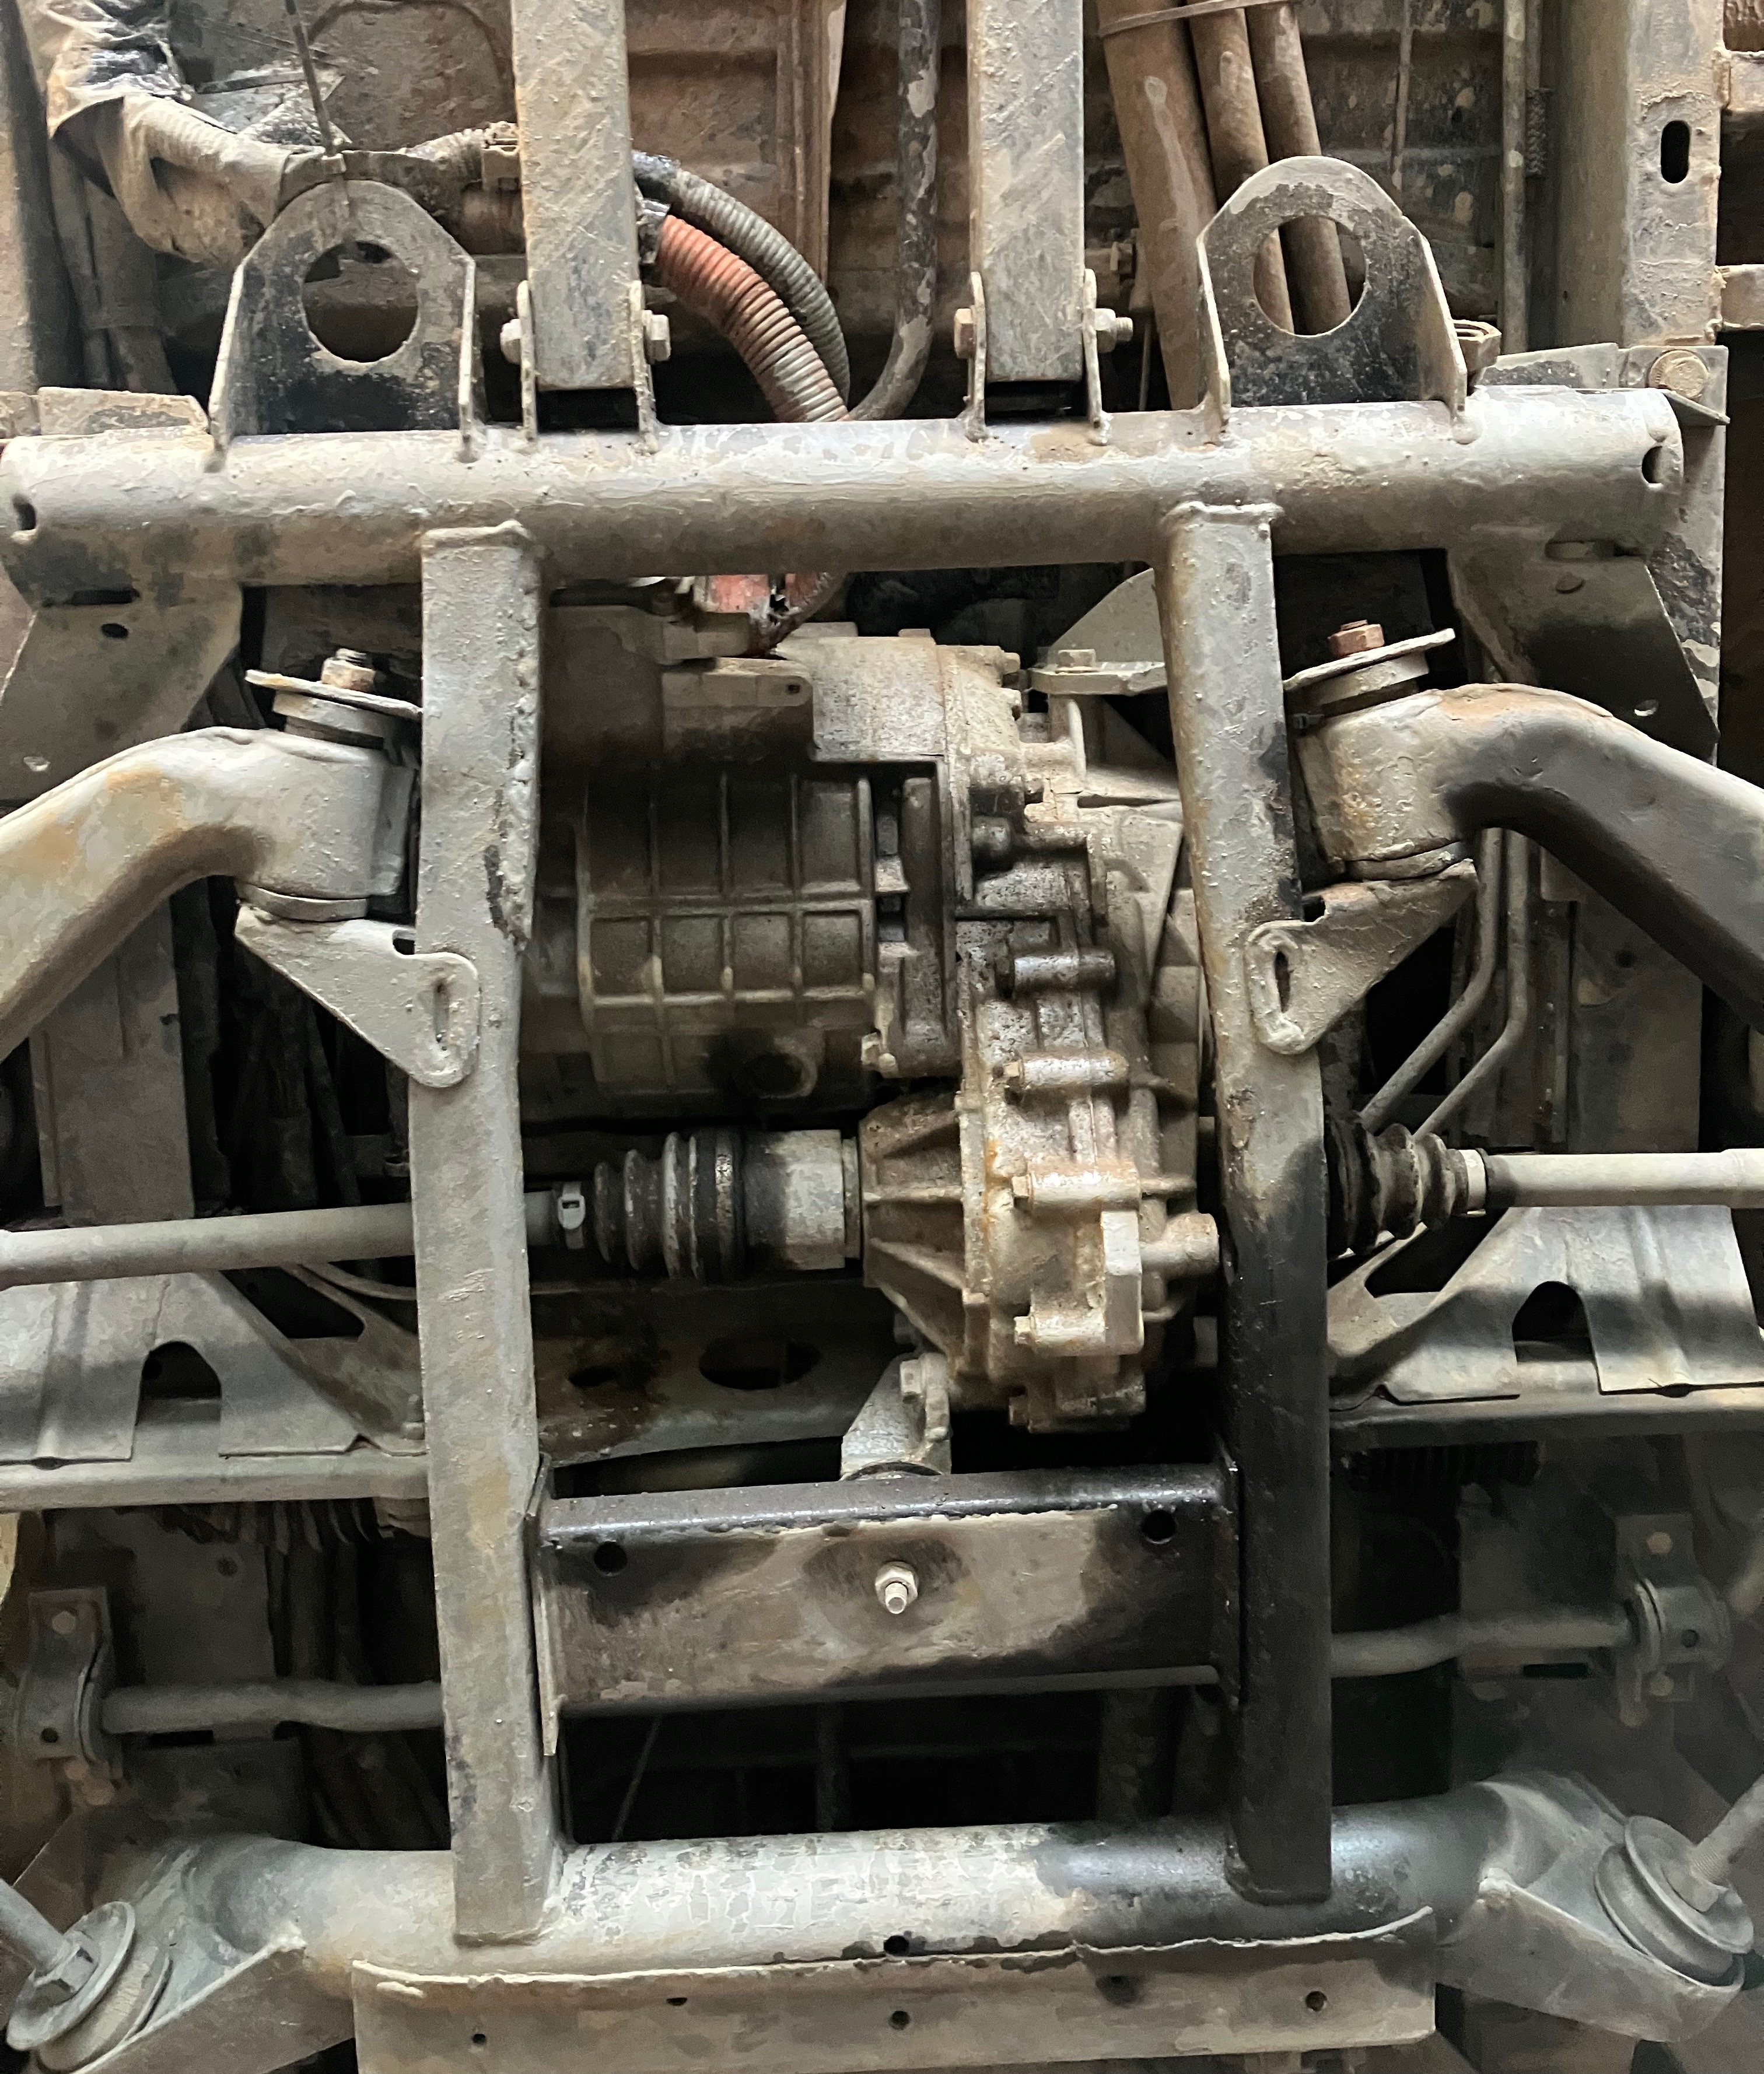
Here’s what the motor looks like mounted in my bus. Significantly dirtier, but I guess I use mine every day.
When I got home I ended up jacking up the wheels and connecting a test battery. It spins great! So the next challenge is getting the coolant loop sorted. Well, after I rebuild the power steering pump, regas the aircon, replace the headliner, and install my camper cabinets.